Xataface provides you (the developer) with many tools to customize the user interface. Some options include:
- Implementing Blocks & Slots in delegate classes.
- Overriding templates.
- Configuration directives in the various INI files.
- Preferences.
- Permissions & Authentication.
- CSS
- Javascript
All of these strategies have a time and place. Before rolling up your sleeves and delving into templates, blocks, slots, preferences, and the like, I recommend seeing how far you can get with just pure CSS by creating your own custom stylesheet.
Using CSS, you can change the logo, hide components on the page, change color schemes, and even modify the layout to a certain extent. Using a modern web browser like Chrome that includes some developer tools, it is fairly easy to peruse the DOM and come up with the appropriate CSS to modify it to your liking.
In this post I will show you how to change the logo and hide unnecessary sections of the UI by:
- Adding a custom CSS stylesheet to your Xataface application.
- Using Chrome's developer tools to identify the parts of the page that you want to modify or hide.
- Modifying or hiding portions of the UI that we identified in the previous step by adding CSS rules to our CSS file.
Including a Custom Stylesheet
We start by creating a blank CSS file in our application's directory. We'll call it "style.css". Then we need to tell Xataface to include this file in the <head> of all pages that are rendered in the app. We do this inside the beforeHandleRequest() method of the Application delegate class (since this is run before every request is handled so we can ensure that the code will be executed:
We make use of the Dataface_Application class's addHeadContent() method that allows you to embed arbitrary content in the <head> section. We use it here to add a <link> tag which includes our stylesheet.
Changing the Logo
In this example, I'm using the
G2 theme. Instructions for other themes will be slightly different because the logo is displayed in different positions using different methods.
Steps:
- Open your Xataface application in Chrome.
- Right click on the Xataface logo, and select "Inspect Element".
- This will open the document inspector so that you can actually see the HTML document tree. If you got here by right-clicking on the Xataface logo, then it should show up with the xataface logo div tag selected.
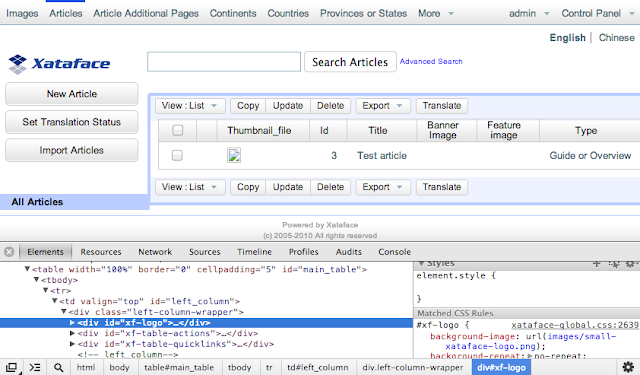 |
| The Chrome element inspector allows you to view the DOM tree. Here you see the xf-logo div seelcted. On the right you can see some of the CSS rules that apply to this element, including the background-image directive which specifies the image file to use for the logo. |
- With the xf-logo div selected you should be able to review the CSS rules that apply to that tag. The first matched rule (seen in the lower right of the above screenshot) specifies that the background-image is at images/small-xataface-logo.png. This gives us a clue as to how to craft our own CSS rule to override this background-image. Let's add a CSS rule in our style.css file to specify a different image file.
#xf-logo {
background-image: url(images/custom-logo.png);
}
Note that URLs in a CSS file are relative to the location of the stylesheet. Therefore, we need to place our custom-logo.png file inside the "images" directory which should be at the same level as the style.css file (i.e. in the main site directory).
- Reload our page in the browser and see if the change worked:
- It looks like it worked, but since our new logo is a different size than the old one, we need to change the dimensions of the xf-logo div tag, so let's make the following change in the style.css file:
- And now refresh the page to see the change:
- You may want to tinker a little more with the CSS to adjust the position of the logo, but we're pretty much there.
Hiding Sections of the Page
Another common request is to hide sections of the page that your users don't need to access. Keep in mind that there is a difference between your users not needing to access a feature and not being permitted to access a feature is very important.
Never rely on CSS to hide features that the user shouldn't have access to. Use permissions for this. Only use CSS to hide sections that aren't needed.
That said, let's take a look at the "View" page for a record, and make some decisions about which parts of the page are necessary, and which parts we want to keep.
As an example, let's take an extreme approach and hide everything except what appears inside the "Details" portlet. No menus. No logos. No search box, etc...
Removing the Left Column
- Let's use Chrome again to inspect the document so we can figure our how to target the left column. We just need to right click somewhere in the left column and select "Inspect Element" option to open the element inspector. We can then hover over the various tags and see some feedback in the browser panel as the representation of tags on which you hover become selected.
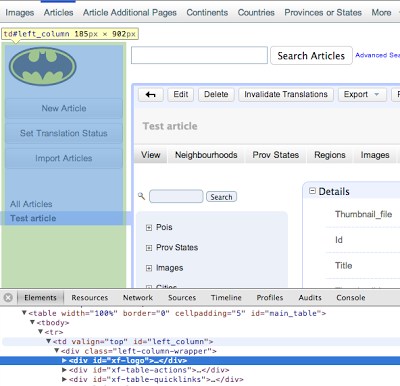 |
| Hovering over the left_column div tag in the element inspector causes the left column to appear selected in the browser panel. This allows you to hover around and identify the tags that you want to hide or modify. |
- We see that the id of the left column <td> tag is "left_column", so we can hide this in our style.css file by adding:
Now, reloading the page we see that the left column is now gone.
- Now, employing similar investigation techniques, we remove the top menu, the search box, the internal left column (i.e. with the tree menus and the record search), by adding the following to our CSS file:
And the result is:
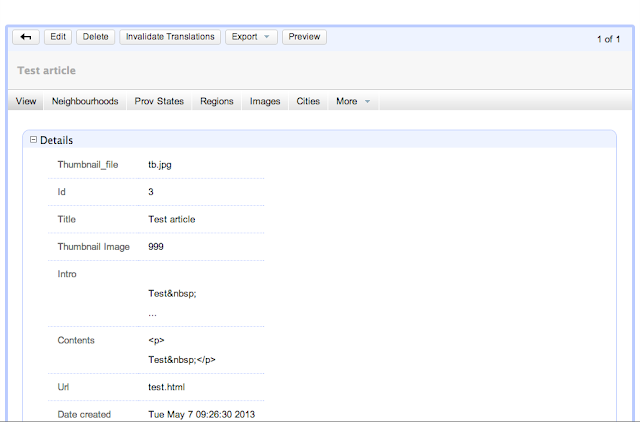 |
| With all of the sections removed, we are left with just the portions of the page that we want to display. |
There is much more that can be done with CSS to customize the look and feel of a
Xataface application. We have only scratched the surface here. I'll let you run with it from here to see what your creativity spawns.


